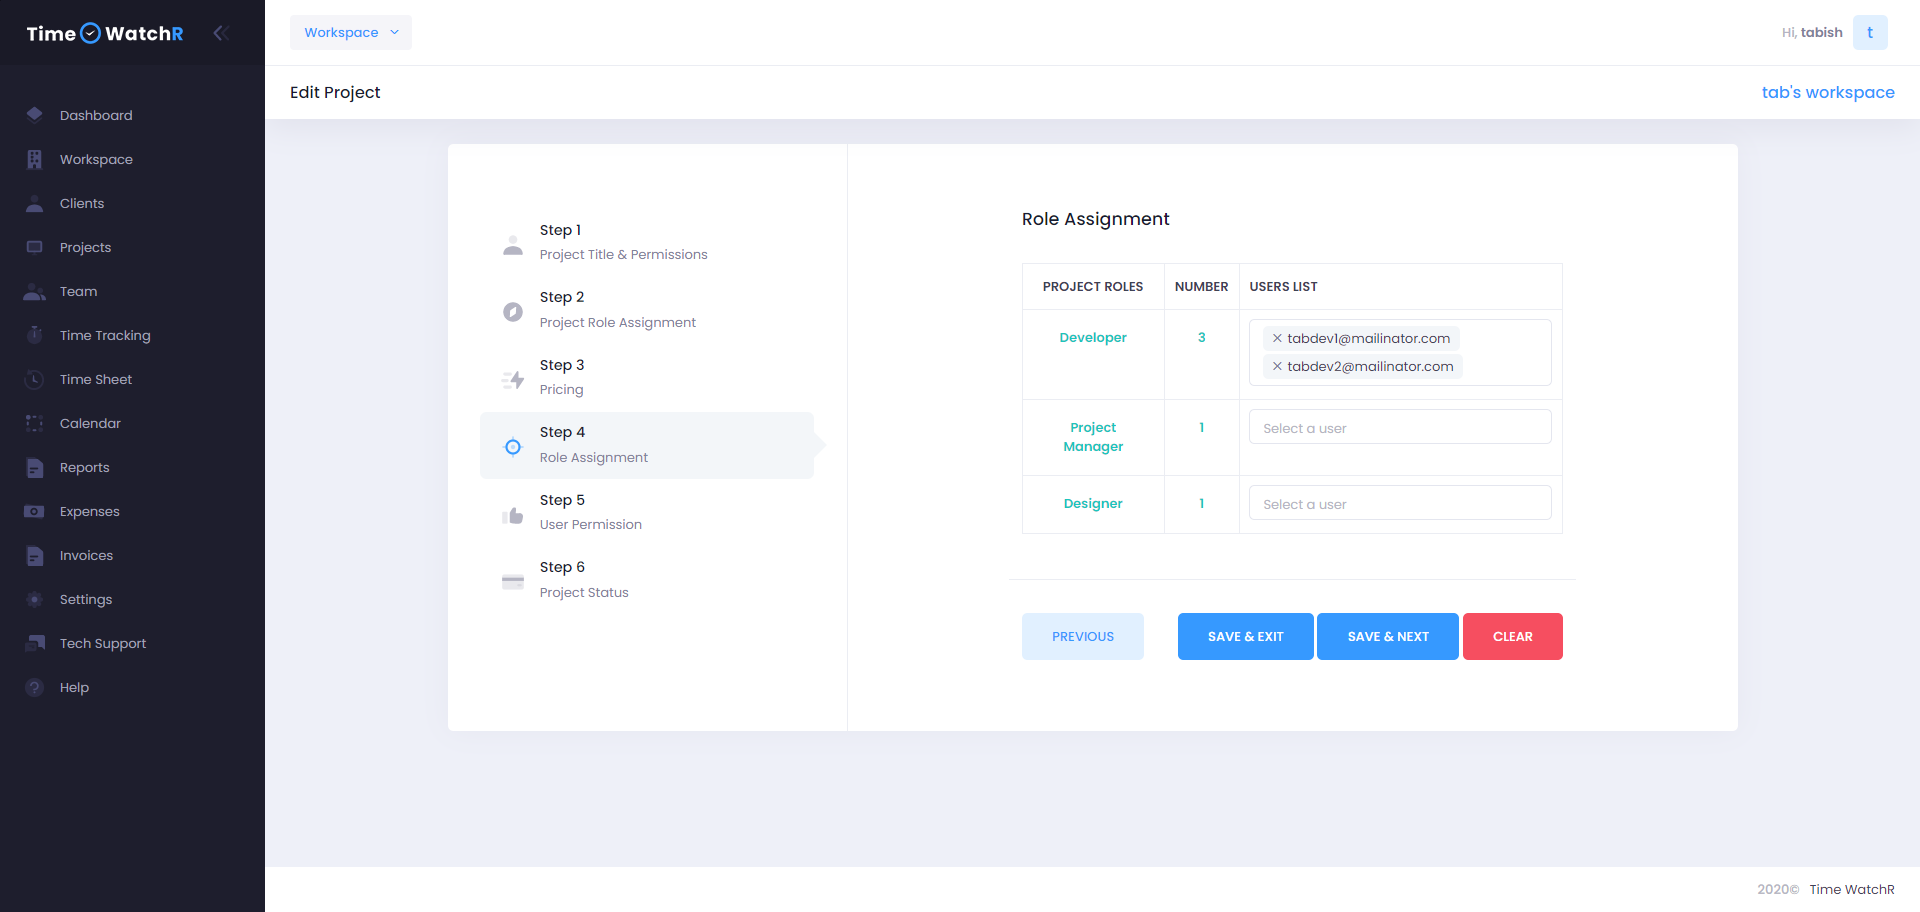
Once the Project-specific roles have been defined and hourly rates have been fixed, users have to be assigned/linked to the role. This can be done as follows:

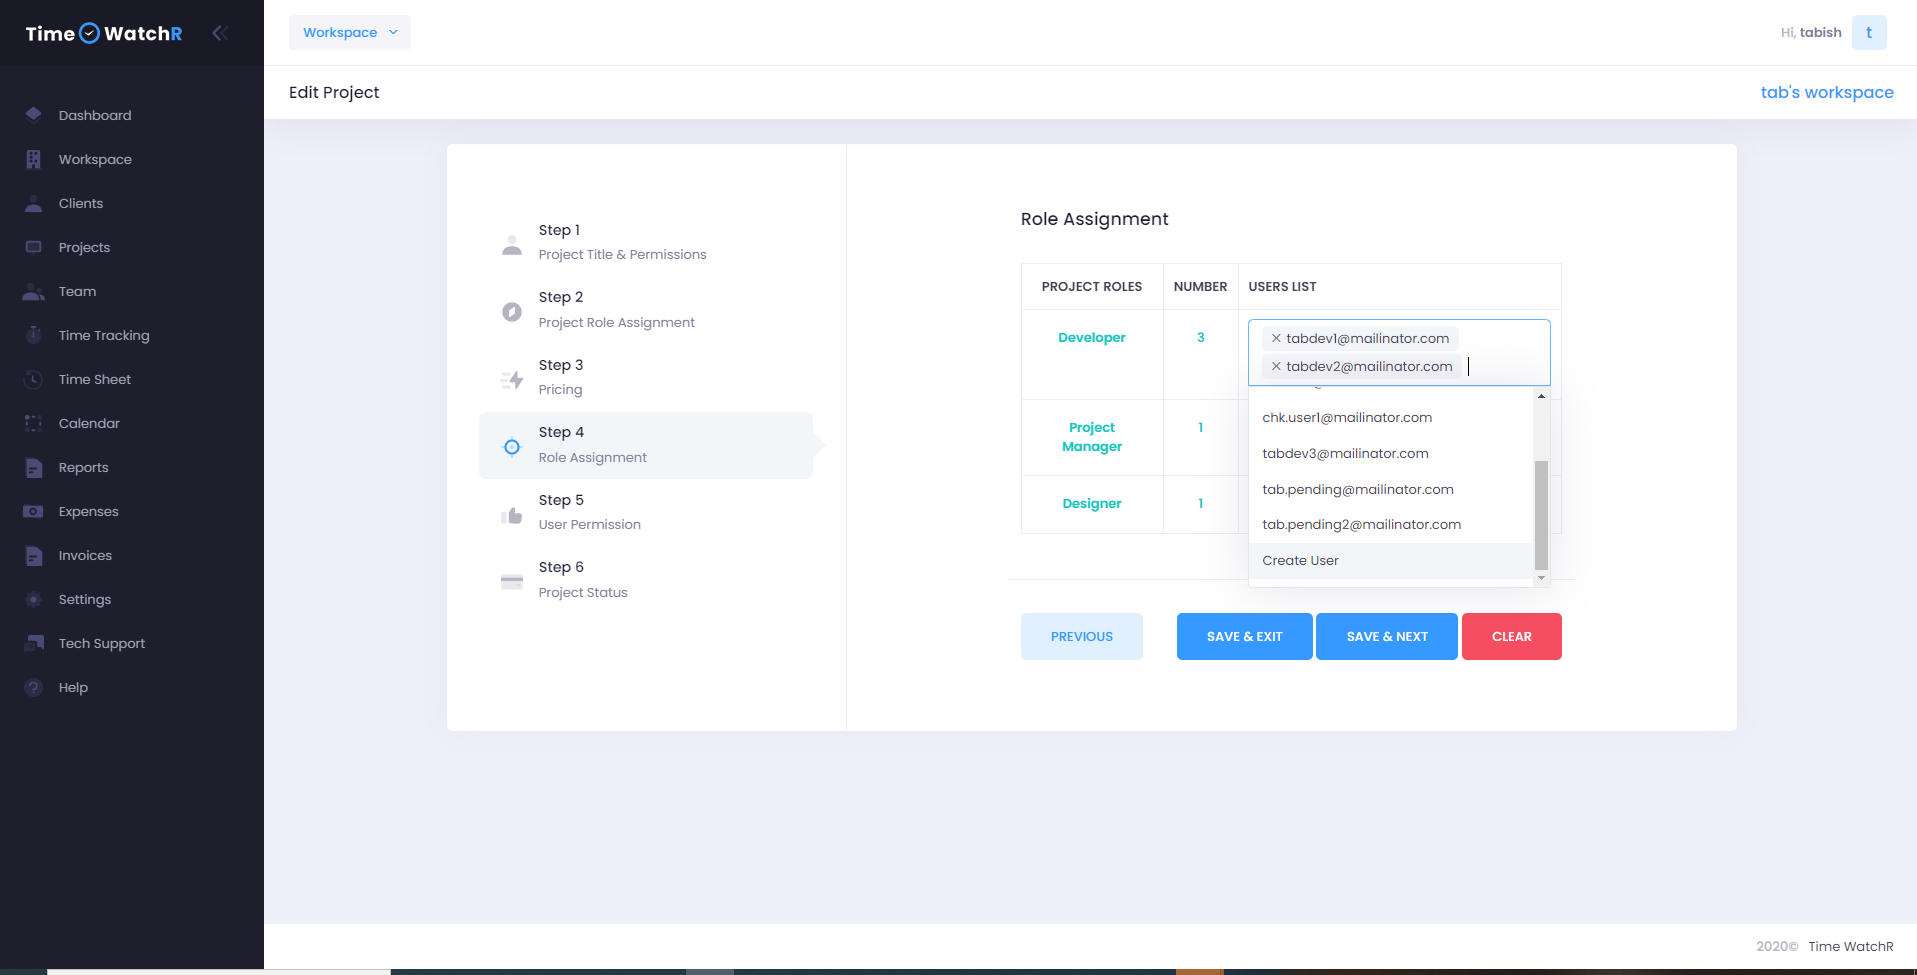
Here, Admin will be able to see that there are 3 columns – Project Roles, Number and User List. Project Roles and Numbers columns are pre-filled as they are defined in the previous steps. The third column which is the User List is where the users (project team members) have to be linked. On clicking the field adjoining a project role, a drop-down list appears to select the existing users that match the role. If there are no users in the list, Admin can create a user by clicking the ‘Create User’ option from the drop-down list as shown below:

Once all the Project team members are linked, Admin can click “SAVE & NEXT’ and move to the next step or ‘SAVE & EXIT’ to save the current step and exit Projects and complete the remaining steps later.
Important Note: Steps 2, 3 and 4 are extremely important as they ensure that every team member has been fixed with accurate hourly pricing. If these steps are ignored and not correctly completed, the Invoices that are generated may not be accurate.

