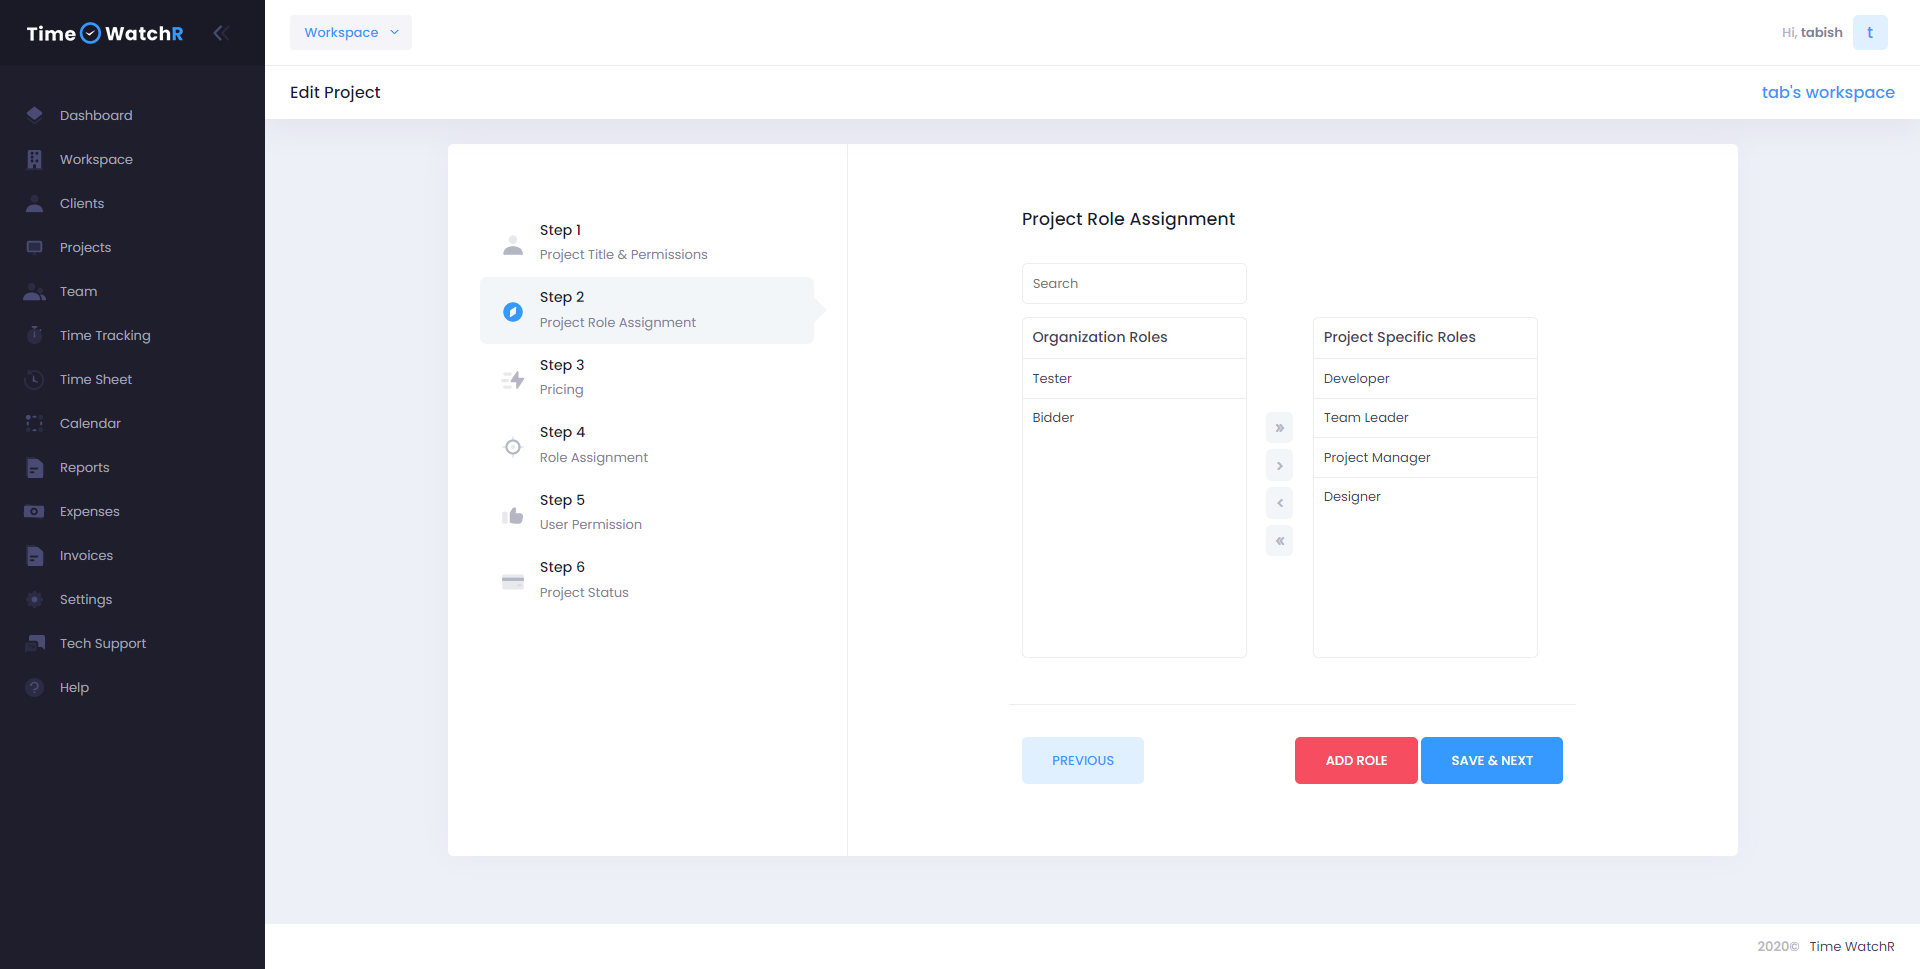
In this step, TimeWatchR maps Organization’s (Admin’s Company) roles/designations to Project Roles. Every Project has a team with different designations and roles. These are mapped with the Organization roles. If the Organization roles do not match with Project roles, Admins can create new Project-specific roles. While creating new roles, if Admin feels that the role can be added to an Organization, this can be done. Image below shows how to link organization roles to Project roles:

In the Project Role Assignment page, the left column displays the Organizational roles (Admin’s Company’s designation/role) and the right column is the Project-specific roles. Initially, when a new project is created, the Project-specific column will be empty. The Organization Roles that match the Project-specific roles can be copied by selecting a role on the left column and clicking the “>” button. This moves the role to Project-specific column. If all the roles have to be copied, then click the “>>” button. Similarly, if a role has to be
removed from the Project-specific role, then, click on the role in the Project-specific column and click the “<” button. If all the roles have to be moved back to Organization roles from Project-specific roles, click “<<” button.
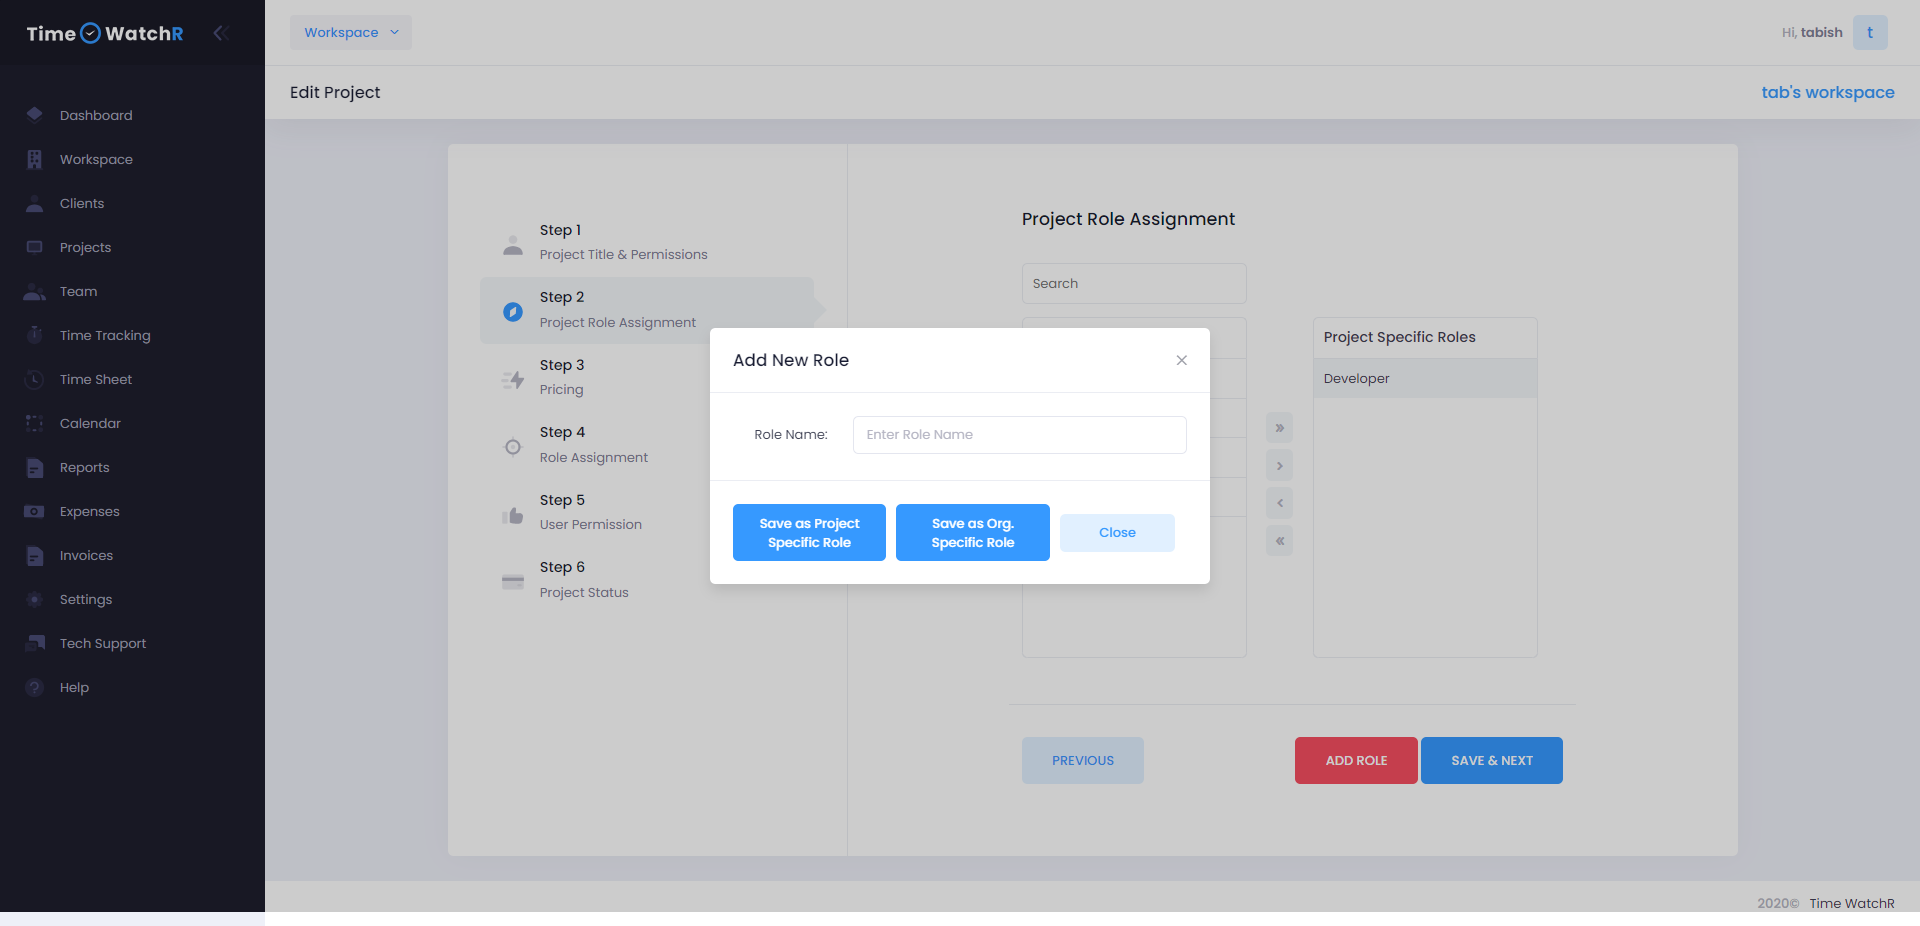
In case, Admin finds that none of the organization roles match the new Project roles, then he/she can create a new role, by clicking the “+ADD ROLE” button on the bottom of the page. On clicking, a pop-up form appears to add a role as shown in the image below:

The newly added role can either be saved as PROJECT-SPECIFIC role or ORGANIZATION role. If the role is saved as ORGANIZATION role, it will be visible in the Designation list of Workspace.
Once Project-specific roles have been added/created, it has to be saved by clicking the ‘SAVE & NEXT’ button at the bottom of the page. This takes to the next Step of Project creation which is STEP – 3

