To create a user, click on the ‘+USER’ button on the top right corner of the User List tab. On clicking the ‘+USER’ button, a pop-up form appears to create the user as shown below:
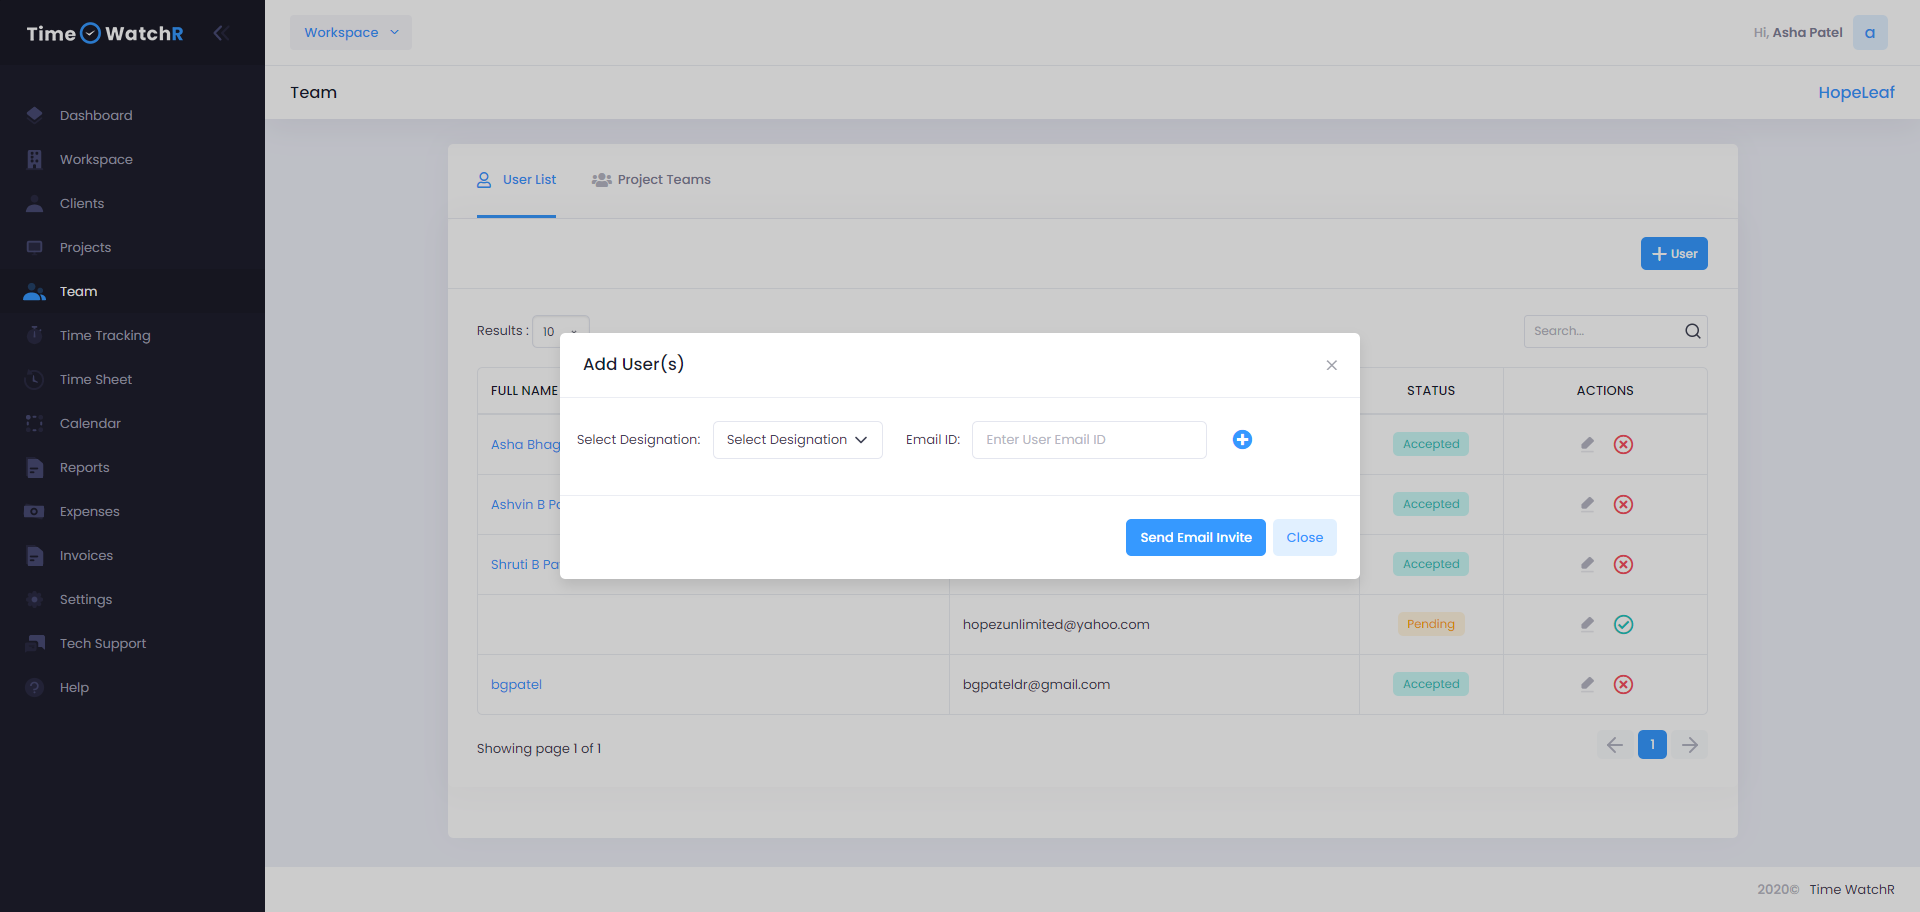
Admin can notice that there is a drop-down to select the designation of the user who is being created. The designation (which has been created in Workspace as an Organization role/designation) for the user has to be selected from the drop-down list. The next field is the email id field. Here the email id of the user, who is being created, has to be entered.
If more than one user has to be created at the same time, then click on the plus icon to create another row of fields. Repeat the same process of selecting the designation and entering the email ids for as many users that have to be
created. Once all details are entered, then click on the ‘SEND EMAIL INVITE’ button. On clicking this ‘SEND EMAIL INVITE’ button, not only creates a new user, but also sends an email invite to the newly created user to create an account with TimeWatchR.
If a user accepts the email invitation and creates an account with TimeWatchR, then in the STATUS column of that user will display an ‘ACCEPTED’ status. If the user has not accepted the invite and not created an account with TimeWatchR, then the STATUS column of the user will display “PENDING”. Further, the full name of that user will also not be displayed. The same can be viewed in the previous image.