If ‘MULTIPLE FENCES’ is chosen from the Geo Fence access type in Step 5 – GeoFence Access and ‘SAVE & NEXT’ is clicked, then a page to grant geo-fence access to all the project team members who have been assigned in the previous steps will appear as below:
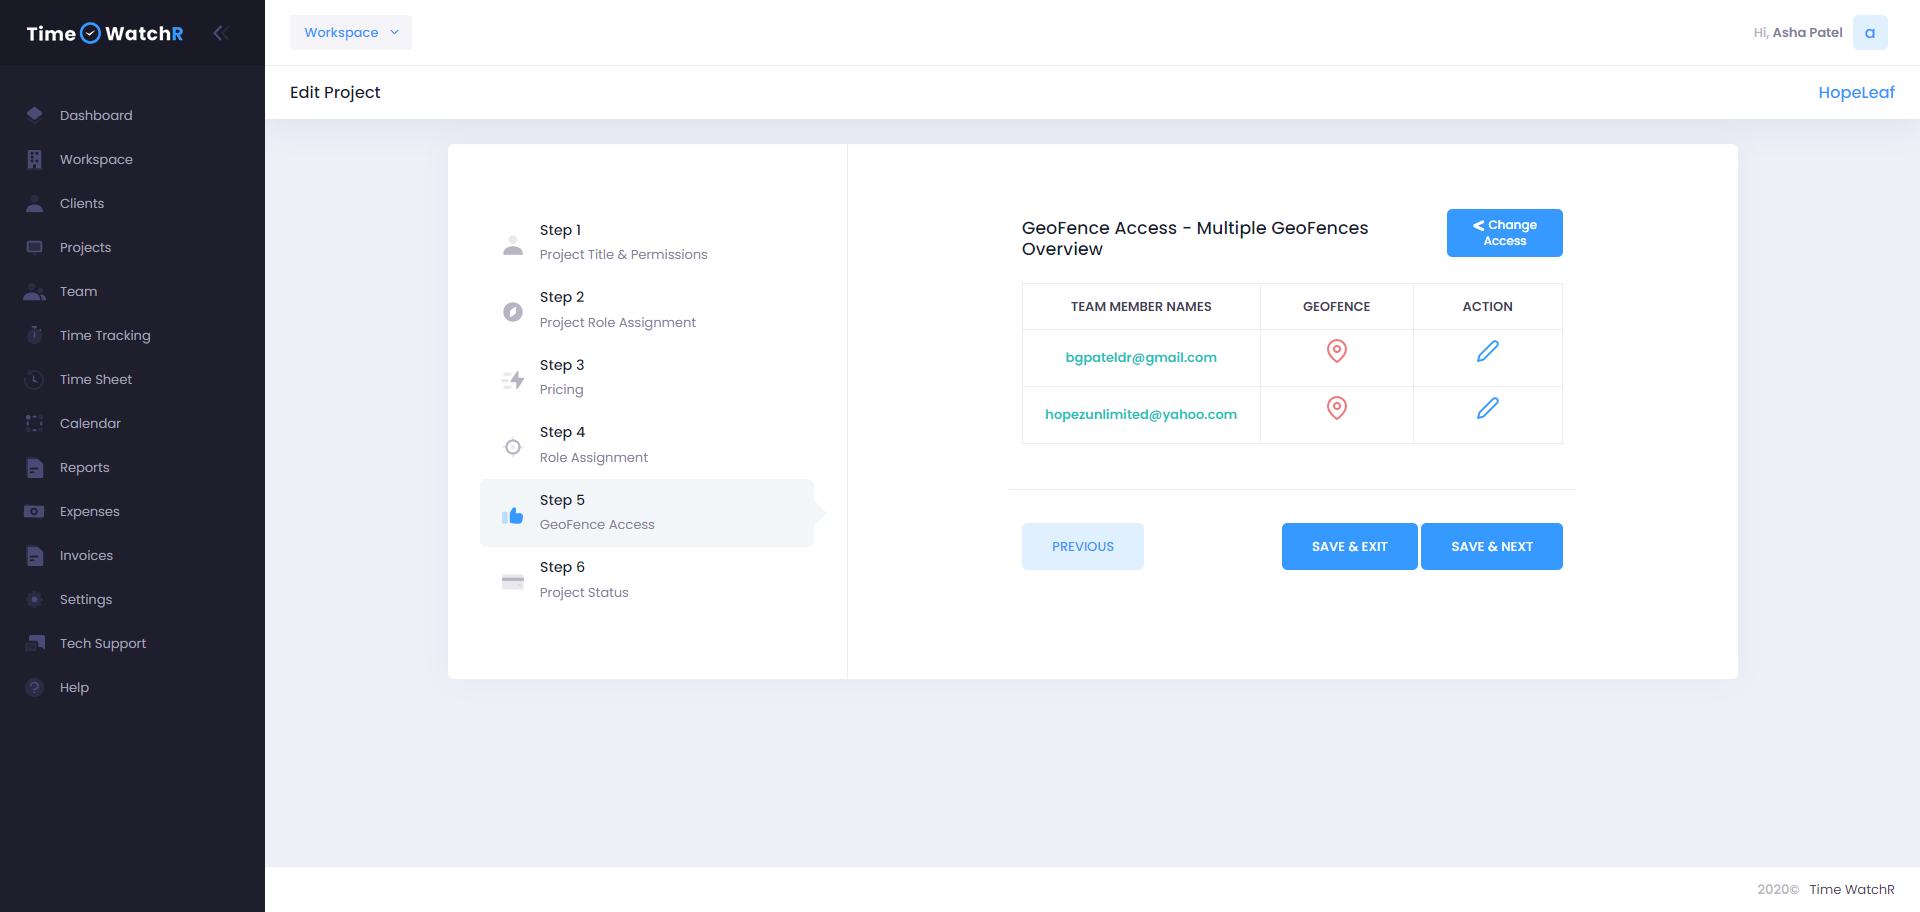
Admin can see that there is a list of all the Project Team members (who are assigned the project in the previous steps) along with a pencil button on each row of the table. On clicking the pencil button, a pop-up form appears as shown below to set the geo-fence for that user:
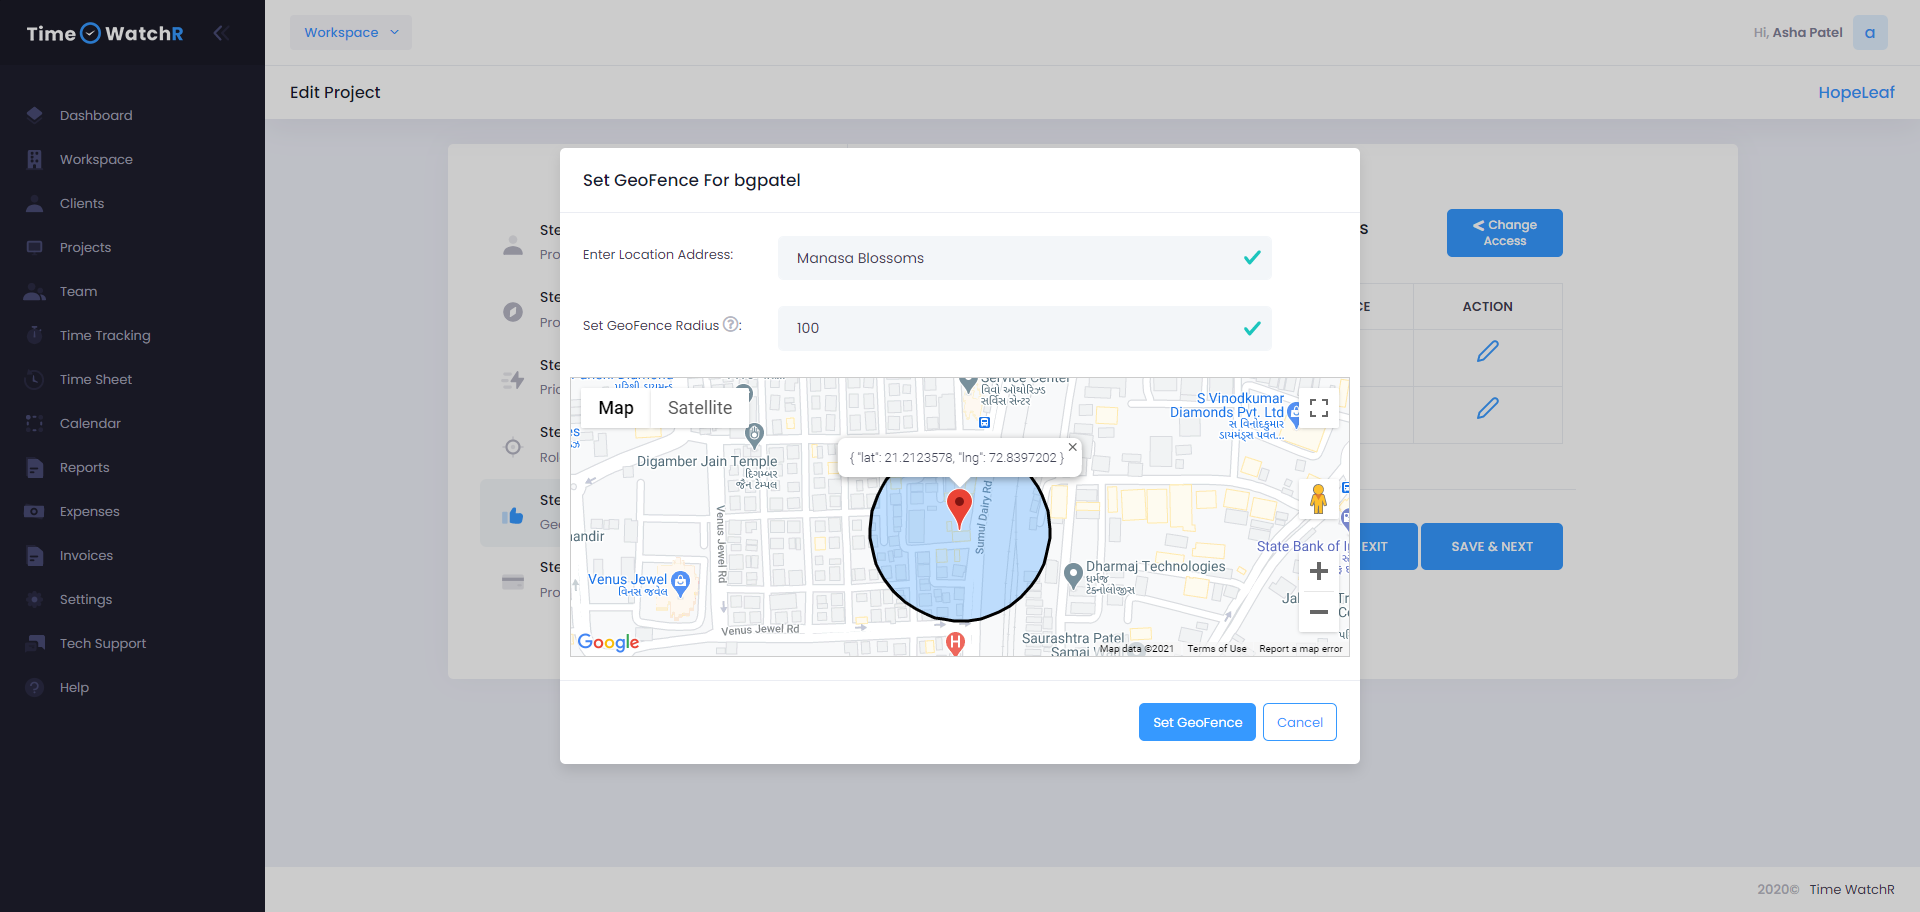
Admin will be asked to Enter the address of the location for which Geo-fence has to be fixed. Upon entering the address, the location of the address will be visible in the map below. If the location is correctly visible on the map then, the radius of the geo-fence has to be entered. This value is numeric and is in meters. If the address is not found on the map, then enter the details of the nearest landmark and drag the map pin to the correct location and create a geo-fence.
Note: Once a geo-fence is set, Admin will be able to view a fence around the location. This means that when a user enters or comes near the geo-fence, then the user’s time tracking timer will start and stop only after the user leaves the geo-fence.
After setting the geo-fence for all the team members in the table, click on ‘SAVE & NEXT’ button. The next step – Step 6 – Project Status, where Admin will set the status of the Project to Active or Hold as mentioned earlier.