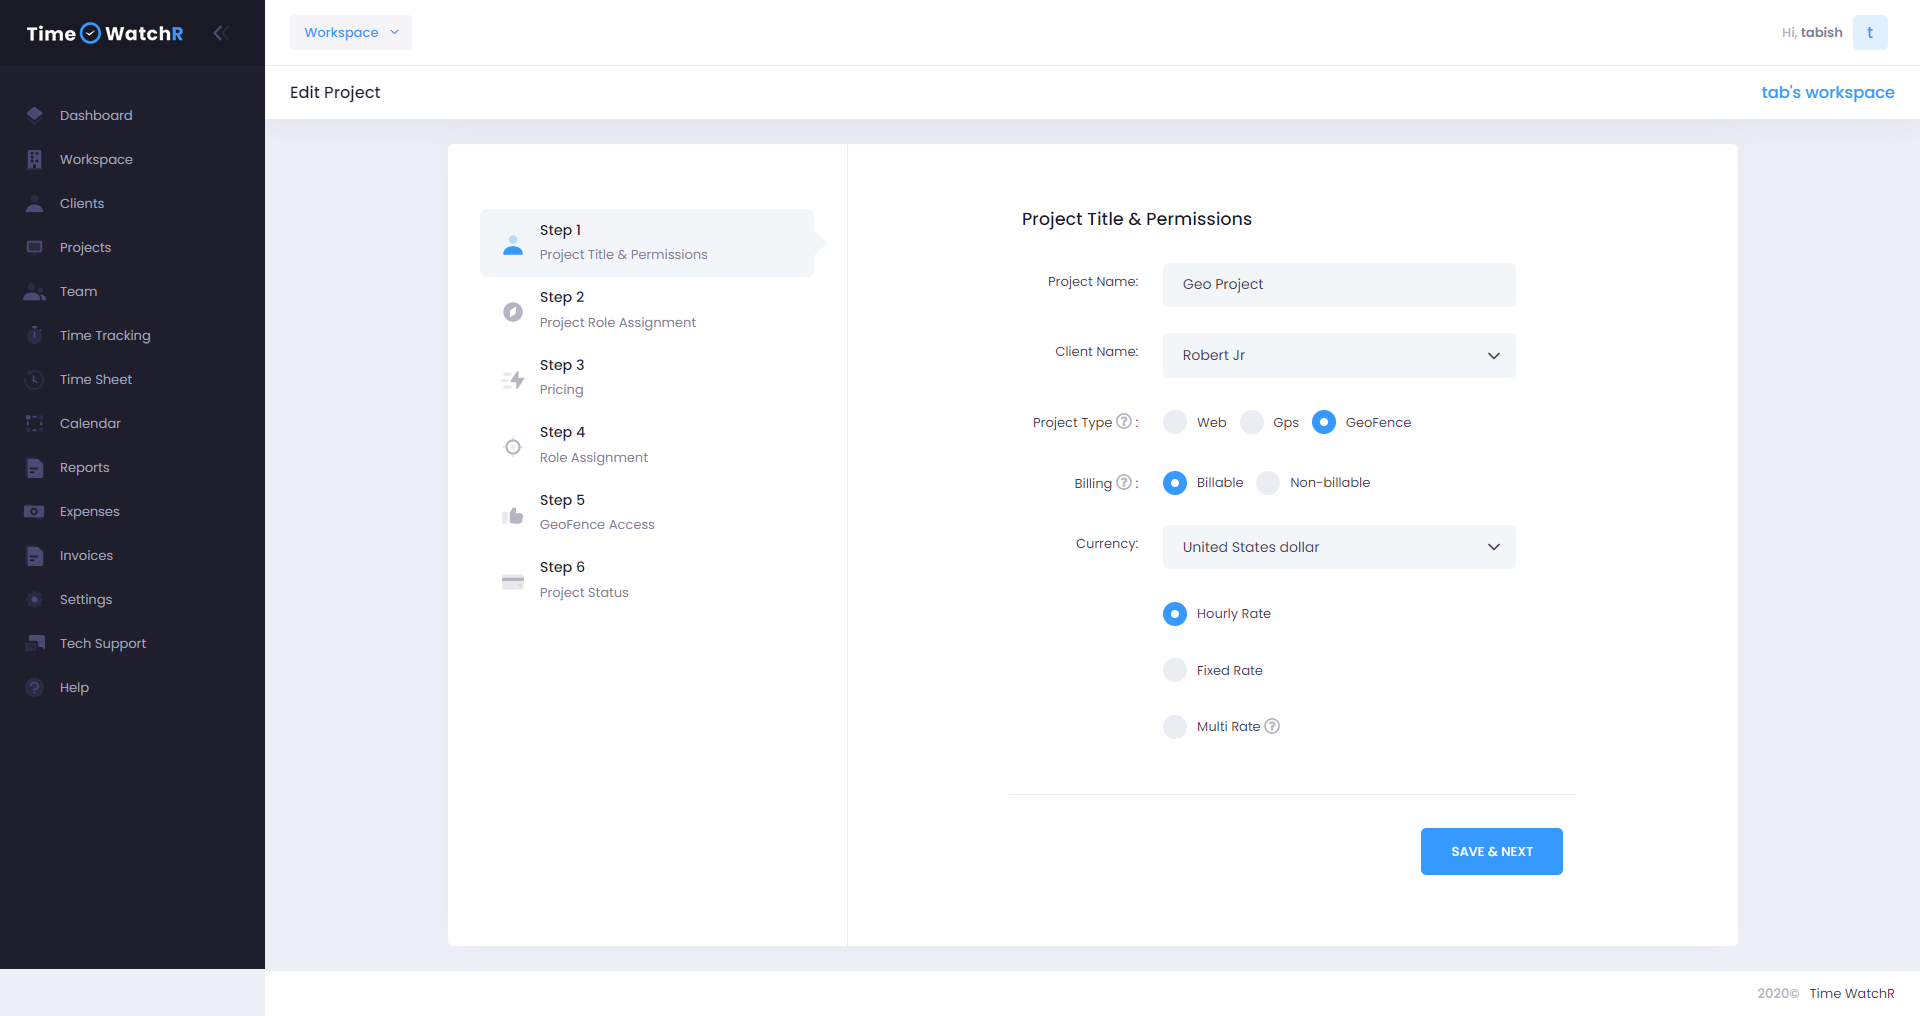
Admins can create Geo-Fence Projects and create geo-fences around a particular location for their employees. This can be done by clicking ‘GEO-FENCE’ as ‘TYPE OF PROJECT’ in Step 1 – Project Title & Permission of the PROJECTS module as shown below:

After selecting Billing or Non-Billing and type of Billing, Admin has to save the details by clicking on ‘SAVE & NEXT’ button. The next steps of Project Role Assignment, Pricing and Role Assignment are the same for Geo-Fence type of Project.
After entering details in Step 2, Step 3 and Step 4, at Step 5 – Geo Fence Access should be granted. In this Step, Geo-Fence access can be created in two following ways:
- Common Fence: If Common Fence is chosen, this means that all the team members of the Project will have the same common Geo-fence.
- Multiple Fences: If Multiple Fences is chosen, this means that every project team member will have a separate location and Geo fence.


